Setting up Adobe Acrobat Pro remediation tools and views
Acrobat Pro has specialized tools that help create an accessible PDF and streamline the remediation process for optimizing accessibility. You can activate different Tool sets available in the Tools menu by clicking on Add. Once a tool is added, it will appear as open. (See Figure 1).
Perform the following to aid your workflow.
- Launch the Action Wizard Tool Set. The Action Wizard is an optional tool set. Among various tools that it provides is an action called Make Accessible, which streamlines processes for making your PDF accessible.
- Launch the Accessibility Tool Set. The Accessibility tools allow you to do most of the work you'll need to do to make an accessible PDF.
- Display the Navigation Panes. The navigation panes show the bookmarks pane, tags pane and some others by default; you should manually select options to display the order (reflow) pane and content pane.
Launch the Action Wizard Tool Set
The Action Wizard is an optional tool set. Among various tools that it provides is an action called "Make Accessible," which streamlines many of the processes for making your PDF accessible.
Launching the Action Wizard tool set is similar to the process for launching the Accessibility tools.
Step A: Click on "Tools" link in the secondary menu
Step B: Scroll down to the "Customize" group, then click the "Add" link under Action Wizard. (see Figure 1)
The Action Wizard tool set will appear in the tools pane (right side of screen by default). You can return to the document as indicated in the Accessibility Tools tab. Using the Action Wizard's Make Accessible tool is covered later in Step Four.
Launch the Accessibility Tool Set
The Accessibility tools allow you to do most of the work you'll need to do to make an accessible PDF. Among the various features are the ability to auto-tag a document, perform an accessibility check, create alternate text and control the reading order and structural types for the content.
To make the accessibility tool set available, perform the following steps:
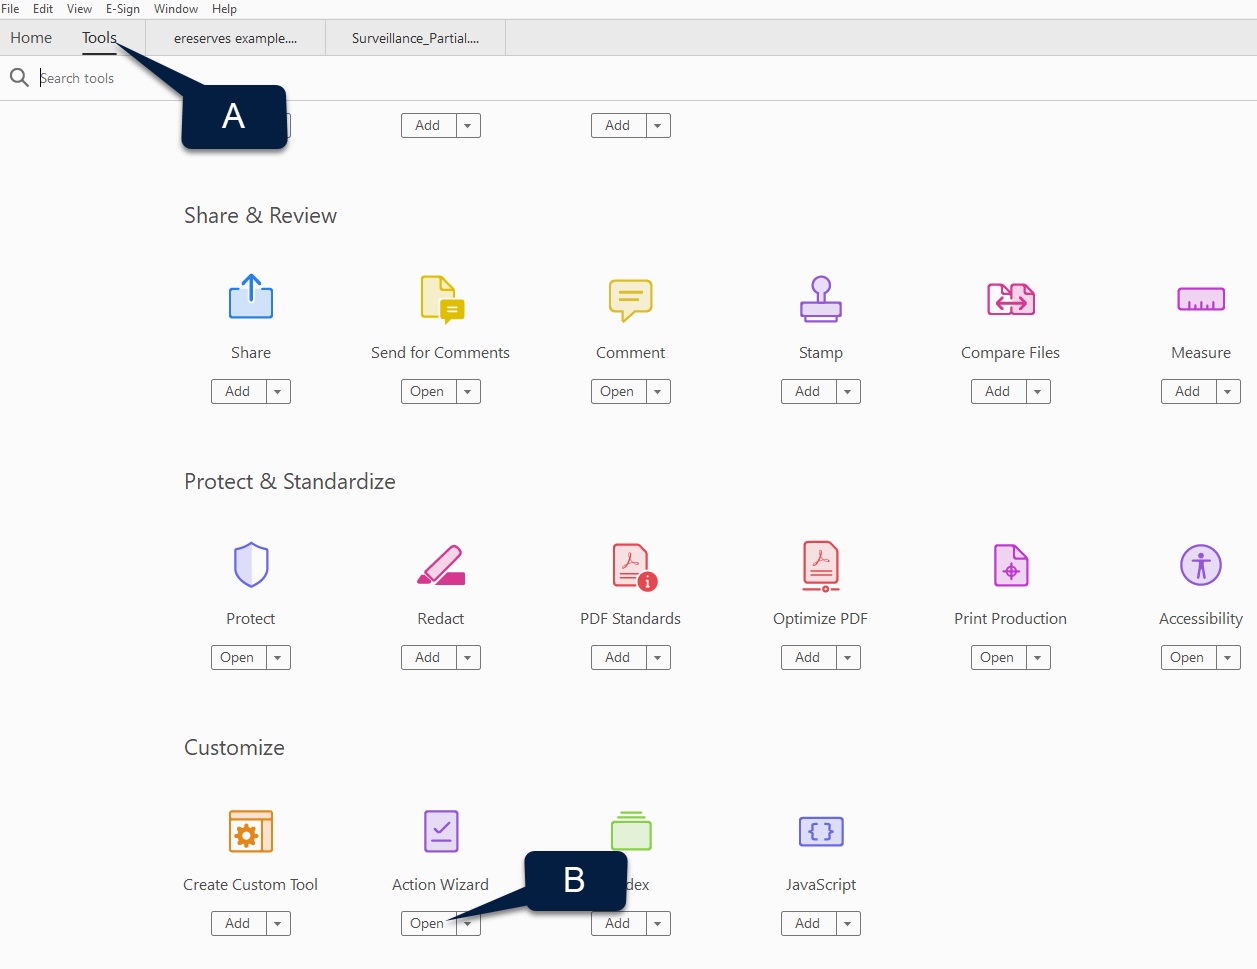
Step A: Click on the "Tools" link in the secondary menu
Step B: Scroll down to the "Protect & Standardize" group, then click the "Add" link under Accessibility. (See Figure 2)
![[Figure 2] Screenshot of the Adobe Pro Tools menu. A flag labeled 'A' marks the Tools menu activation, and a flag titled 'B' marks the Accessibility option listed under Protect & Standardize.](/main/images/divisions/tlt/components/accessibility/screenshot-tools-turn-on-accessibility-option.jpg)
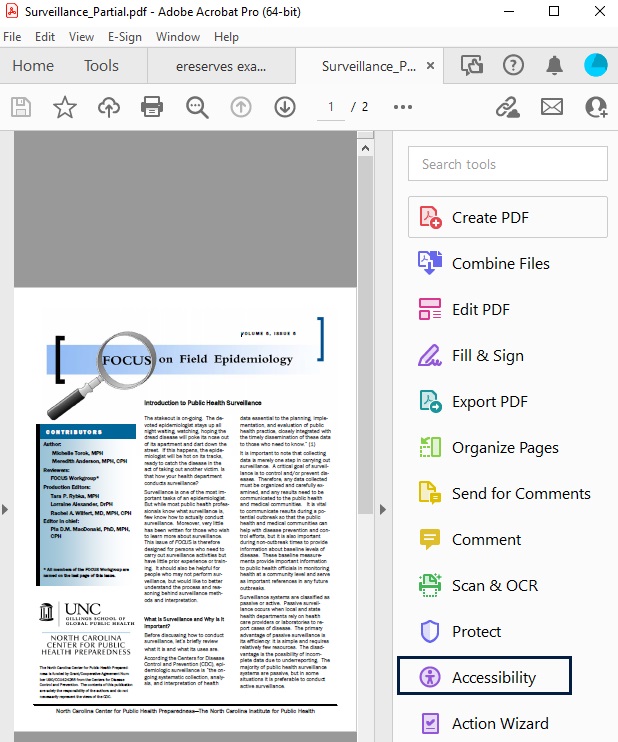
The Accessibility tool set will appear in the tools pane and appears on the right side of screen by default (see Figure 3). You can click on the tab next to where you accessed Tools (it shows the document name) to return to the document.
The Accessibility tool set will now stay listed among the available tools in the right sidebar. If you don't see the tools pane, click "View" and then click "Show/Hide" and then click "Tools Pane" and it will appear (see Figure 4)
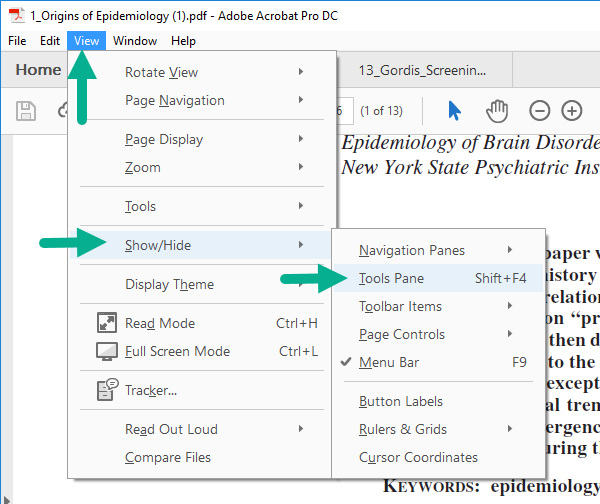
[Figure 4] Screenshot of an open file in Adobe Pro with a drop-down menu visible over the text from the "View" navigation menu. An arrow points to the user where to click on "View," with another arrow pointing to "Show/Hide" to toggle a side-menu that shows the user an arrow pointing to "Tools Pane," that the user can click to toggle on the Tools Pane option.
Display the Navigation Panes
The navigation panes show the bookmarks pane, tags pane and some others by default, and you can manually select options to display the order (reflow) pane and content pane. These panes can be turned on as needed later, but can be helpful to have them available even before starting to remediate a PDF document. You can also use these panes to see progress and changes when manually remediating a document.
Step 1: In the Acrobat menu bar, click "View"
Step 2: Click "Show/Hide"
Step 3: Click "Navigation Panes"
Step 4: Click "Show Navigation Pane"
To add the Tags and Order panes, repeat steps 1-3, then do the following:
- Click "Order" for the Order panel
- Click "Tags" for the Tags panel
The navigation panes display per document. If you have more than one document open in Acrobat, you'll need to change the view settings for each document.