Using Respondus Monitor with Pearson MyLab
Respondus LockDown Browser is integrated with Pearson MyLab. LockDown Browser and Monitor can be enabled under Course Settings on the MyLab site. Once enabled, you can require LockDown Browser and Monitor for specific exams.
This is a two-step process:
- Enable LockDown Browser and Monitor in the course on the Pearson MyLab site.
- Adjust the settings for the exams you intend to require for LockDown Browser and Monitor.
You can learn more about using Respondus LockDown Browser and Monitor with MyLab by viewing the following video from Respondus: Respondus Monitor for Pearson MyLab Tests
Enabling LockDown Browser and Monitor in the course
Before you can use Respondus Monitor for your Pearson MyLab course, you will need to find the license code in the course on WebCampus. You will then enter the code on Pearson MyLab course site during the setup.
The license code is unique to each instructor. To find the code, do the following:
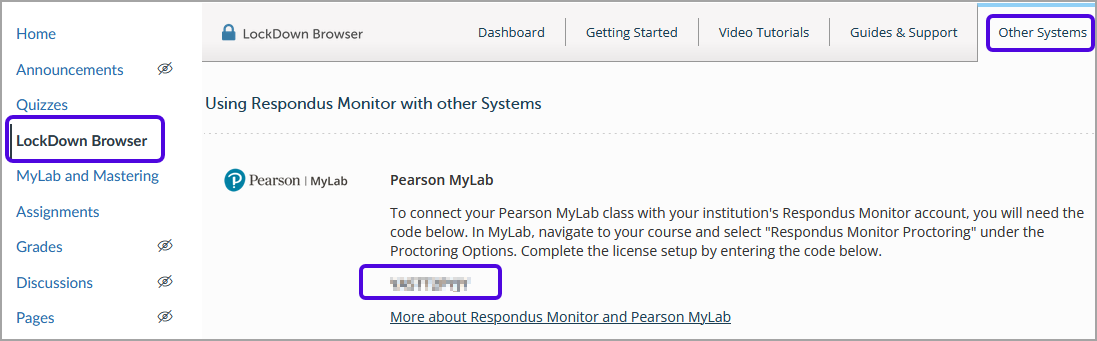
Step 1: Go to your course on WebCampus, then the LockDown Browser Dashboard.
Step 2: Click on the Other Systems tab. You will see a code under the Pearson MyLab section. Copy the code.
To continue setting up Respondus LockDown Browser and Monitor, do the following:
Step 1: Go to the Course Settings in MyLab, then scroll down and find Learning Aids and Test Options. Click Edit.

Step 2: Check the LockDown Browser option if you want to use the LockDown Browser only, and “Use automated proctoring in this course” if you also want to record students screen activities and testing behaviors. Make sure you choose “Respondus Monitor Proctoring” as the proctoring partner.
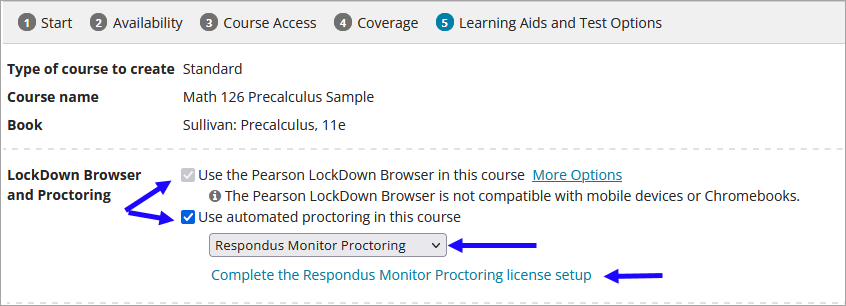
Step 3: Click on the link “Complete the Respondus Monitor Proctoring license setup”. This will open a pop-up window asking you to enter the Respondus Monitor license. Paste the code you find in the WebCampus course in the previous step. Then click Make Available. Don’t forget to Save the change.

You have successfully enabled Respondus Monitor in your MyLab course. In the Course Settings, you can see under Learning Aids and Test Options, both LockDown Browser and Monitor are being used.
Setting up LockDown Browser and Monitor for exams
This can be done when you create an exam or by editing the exam settings. Follow the simple steps below to add LockDown Browser and Monitor requirement to an existing exam.
Step 1: Go to Assignment Manager and find the exam or test for which you intend to require proctoring. Choose Edit from the Action menu.
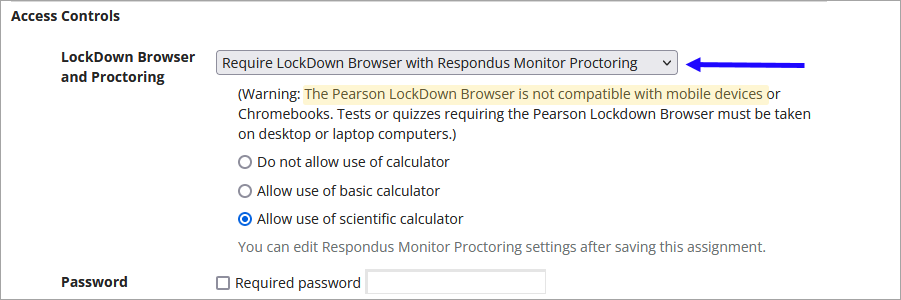
Step 2: On the Edit Quiz page, go to Choose Settings. Under the Access Control section, choose the option for LockDown Browser and Proctoring. (Note that students are NOT able to use iPad for proctored Pearson MyLab exams.) Select the option for the use of calculator. Then Save, or Save & Assign.
Accessing the Respondus LockDown Browser Dashboard
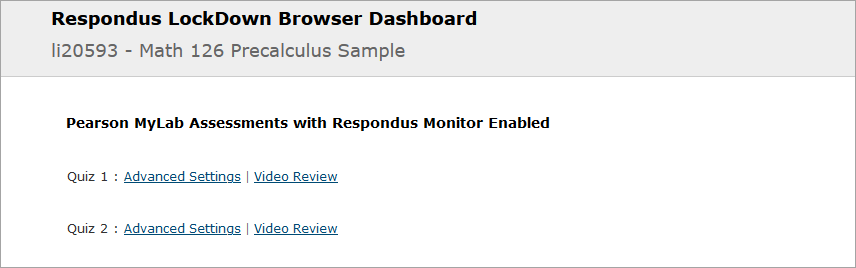
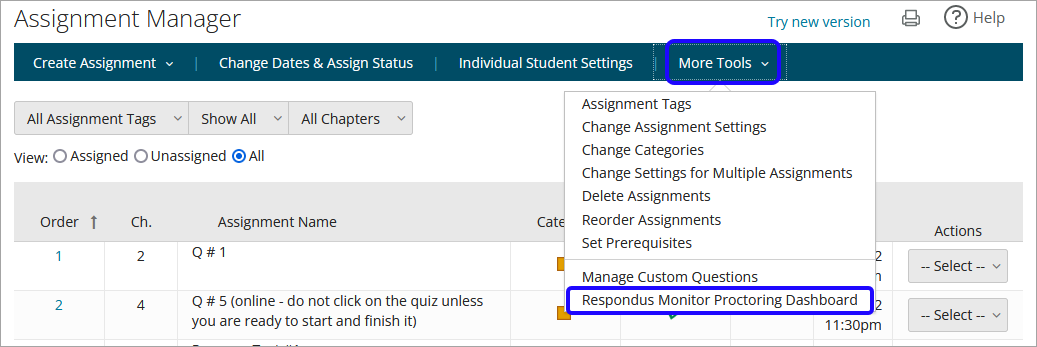
After you enable Respondus Monitor for exams, you are able to adjust the settings and view the recordings on the Respondus LockDown Browser Dashboard. The dashboard can be accessed in Assignment Manager, under More Tools.
On the dashboard, note that only exams that require Respondus Monitor are listed. Click on the Advanced Settings link, and you are able to view and adjust the proctoring settings. To learn more about the proctoring settings, refer to the guide Using Respondus Monitor for WebCampus Quizzes. To view student recordings, go to the Video Review link. To learn more about viewing student recordings, refer to the guide Reviewing Respondus Monitor Recording.