How to make an improvised document camera using Zoom and your iPhone or iPad
The following are directions how to make an improvised Document Camera out of your iPhone or iPad using Zoom. Unfortunately, there is no sharing option for Android devices in Zoom.
Note: This solution will not work on the Eduroam WiFi on the University of Nevada, Reno campus.
What you will need:
- iPhone or iPad
- A WiFi connection that allows Screen Mirroring (this solution will not work on the Eduroam WiFi network on campus)
- 3 soup cans or a stack of books (anything could work really but cans seem to work best)
- A note pad or some paper
- Something to write with, preferably something dark with a wider point (if possible)
Getting set up
You will eventually want things to look like this:
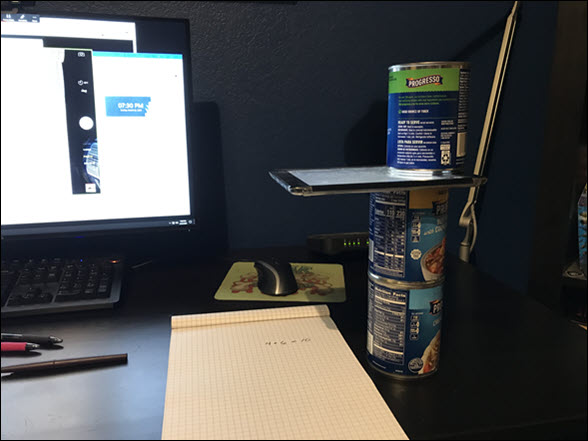
Make yourself some space and get things somewhat setup. You are going to need to use your iPad to link it to your Zoom meeting before you place the top can.
Next get Zoom ready
Step 1. Launch the Zoom application on your computer.
NOTE: If you do not yet have the Zoom application please visit the University's Zoom portal. Please note this is a University-specific website and NOT the main Zoom website.
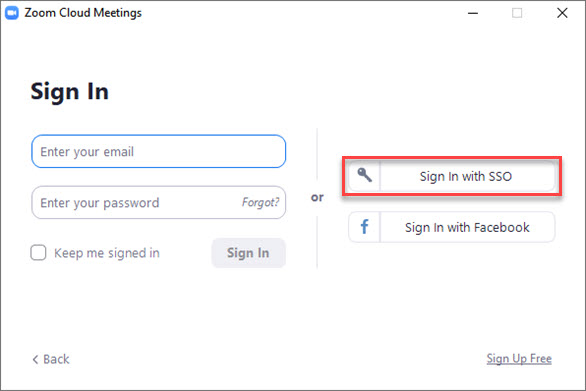
Step 2. Click on the “Sign in with SSO” login option. This will open the University's SSO login webpage in your web browser. Once you have logged in, you should be prompted to return to the Zoom application.
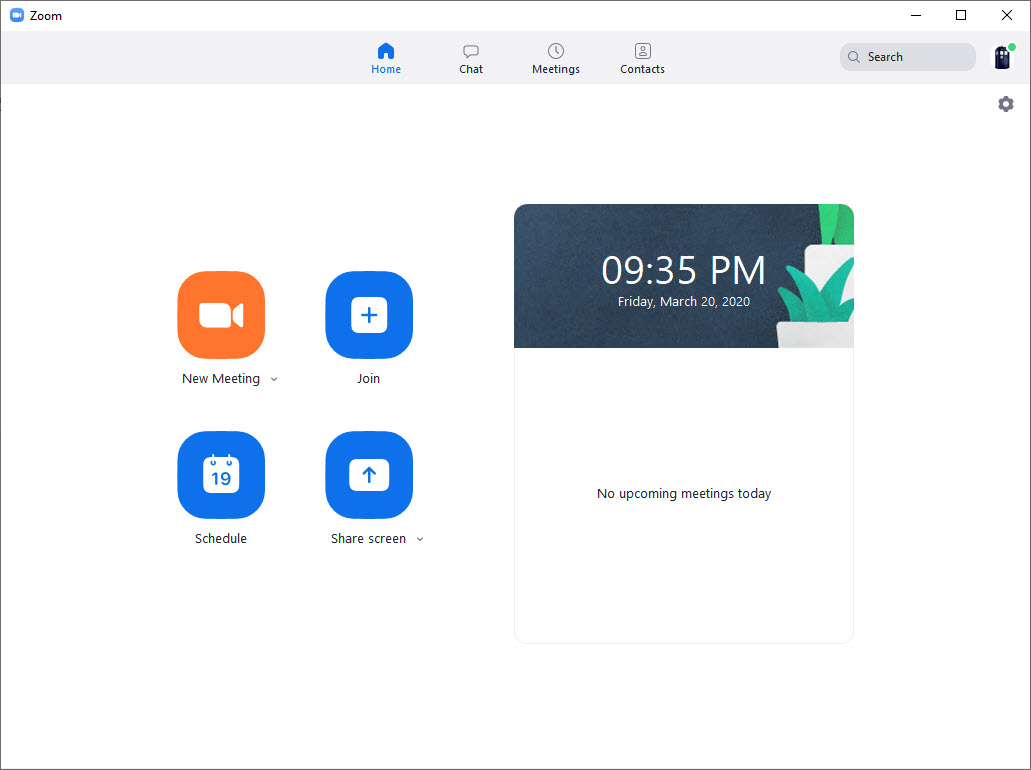
Step 3. From the Zoom application, click on New Meeting.
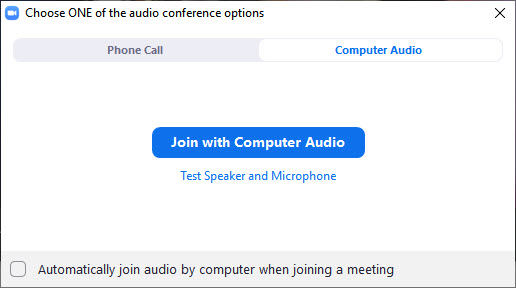
Step 4. When the meeting interface loads, select “Join with Computer Audio” when prompted. This will use the default mic and speakers on your computer.
Step 5. Verify your mic is working – the mic icon on the mic button should flash green in response to your voice, if working. Alternatively, you can use the audio options (chevron to the right of the Mic button) to test your mic. This step will help to ensure you have a viable recording.
Step 6. Click on Share Screen at the bottom of the meeting window.
Step 7. Select the iPhone/iPad option.
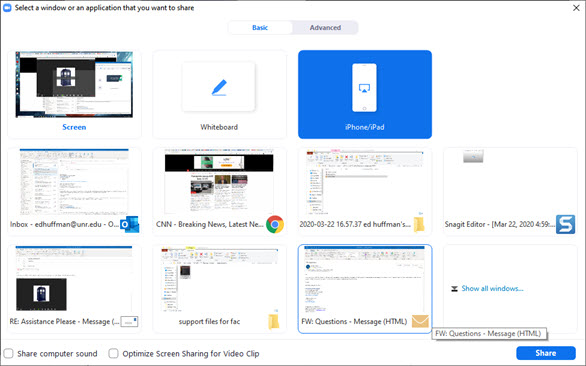
Step 8. Click on the share button
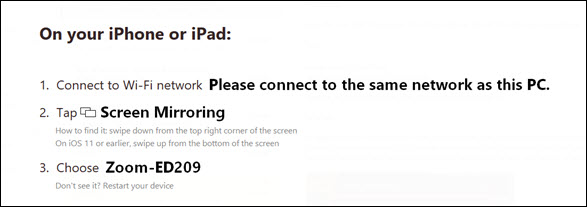
Step 9. Zoom will now display screen mirroring information
NOTE: Your iPhone/iPad must be on the same WiFi network as the computer that is running your Zoom meeting.
Step 10. On your iPhone/iPad access the control center – this varies by iOS version and device:
- On an iPhone X or later, swipe down from the top-right corner of your screen. To close, swipe up from the bottom of the screen or tap the screen.
- On an iPhone 8 or earlier, or iPod touch, swipe up from the bottom edge of any screen. To close, tap the top of the screen or press the Home button.
Step 11. Tap Screen Mirroring and select the option that matches the information shown on Zoom. Your iPhone/iPad screen should appear on Zoom on your computer.
Step 12. Toggle to the Camera app on your iPhone/iPad. Make sure you turn the device, so it is in an horizontal, or landscape, orientation.
Step 13. Place your device carefully between the top two cans and align your paper underneath.

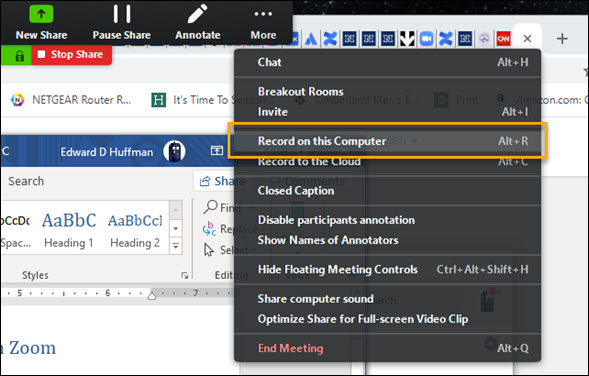
Step 14. In the Zoom toolbar along the top of the screen, click on the More drop-down and select the Record on this Computer option.
Step 15. Begin your lecture or demonstration. Proceed through your content as you normally would.
Step 16. When you are done, click on the More drop-down in the top Zoom toolbar and select the stop recording option.
Step 17. You can now stop the share by clicking on the red Stop Share button in the top Zoom toolbar.

Step 18. You will be taken back to the main meeting interface.
Step 19. Click on End Meeting and then End Meeting for All when prompted.
Step 20. Your recording will be located in C:\Users\COMPUTER USER\Documents\Zoom\YOUR FILE.mp4 .
Step 21. Upload your file to MyMedia (Kaltura) in WebCampus and publish to your courses as needed.
PRO TIP: You only need to upload a file once to your MyMedia, and you can use it across multiple courses, across multiple semesters.
Step 22. To request captions, please email captions@unr.edu. Be sure to include the video title. Allow approximately 5 days for captions to be processed.