Streamlined PDF remediation
The streamlined method for PDF remediation will provide some essential functionality for assistive technology users. Although not comprehensive, it will improve accessibility beyond simply autotagging when time and resources are limited.
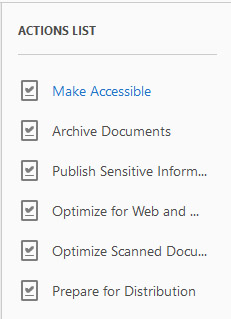
Table of contents
Step 1: Check if the PDF is already tagged
PDFs use an internal tagging structure to indicate the structure and order to screen readers and other assistive technologies. Check if the PDF is already tagged from document properties. From the top Acrobat menu, click "File" and then click "Properties." The Document Properties dialog box appears with the Description tab active by default. In the bottom left corner in the Advanced box, the text "Yes" or "No" next to "Tagged PDF" indicates whether or not the document is already tagged.
If your PDF is already tagged
If the PDF originated from a digital document with the accessibility options activated when it was saved, it may already be tagged. These tags are often more accurate than if Adobe Acrobat automatically tags the document using the "Make Accessible Tool" described below. If your document is already tagged, skip to Step Three.
If your PDF is not tagged
Adobe Acrobat can make a first pass at tagging the document. You may need to manually update some of the tagging structure and order, but using the automated feature will provide a head start. In this case proceed with Step Two.
Step 2: Run the "Make Accessible Tool" or autotag the document
There are three options to tag (or re-tag) a document: manually adding tags, using the Make Accessible Tool or autotagging the document.
- Manually adding tags. Manually adding tags is the most accurate, but slowest, process.
- Using the Make Accessible Tool. The Make Accessible Tool streamlines other accessibility work, so it's the recommended solution
- Autotagging the document. Autotagging, followed by some fixes after running an accessibility check works too.
The following processes will allow you to re-tag a document that has already been tagged, but depending on the quality of the source, the tagging may be less accurate than pre-existing tags. When tags exist, it's usually quickest to skip to Step Three to review the quality.
Step 2.a. Run the "Make Accessible" action from the "Action Wizard"
The Action Wizard tool has a "Make Accessible" action that automates much of the process for making an accessible PDF. More than just tagging, this action automates a variety of tasks (e.g., sets language and displays title, prompts the user for alt-text) that will help a document pass many of the accessibility checker tests.
Although it works well, the result of the process usually needs remediation work. For example, it may not tag and structure everything properly it can be difficult to know which image the wizard is indicating for alt text; when this is the case, you can skip parts and manually adjust items later. These warnings shouldn't discourage you from using the tool. It can save time. It is wise to be aware the process isn't finished when you've used this tool.
After you add the Action Wizard to your tool set, you can toggle between "Accessibility" and the "Action Wizard" by using the arrow next to the active tool listed above the active tool panel.
![[Figure 1] Screenshot of the 'Accessibility' drop-down menu in Adobe Acrobat with options such as 'Create PDF,' 'Edit PDF' and 'Protect.' A green arrow points to where users click to access the Acccessibility drop-down menu and a green arrow shows users where to click to access the 'Action Wizard' tool.](/main/images/divisions/tlt/components/accessibility/streamlined/action-wizard.jpg)
Running the Make Accessible tool
With the Action Wizard active, click on the "Make Accessible" link in the right sidebar. See Figure 2 for visual example.
A series of steps will appear in the tool's side bar along with a "Start" button/link. [See Figure 3 below for a visual example]
Click "Start" and a series of prompts will aid you through the following:
- Complete the Description box. In the "Description" box that appears, click "Leave-As Is" to deslect it (located next to "Title") and type the actual name of the document (you'll notice that is typically defaults to the file name, which will need to change). Other fields are optional. Click the "OK" link.
- Set the primary document language. In the "Recognize Text - General Settings," select the primary document language (other settings can be left at defaults). Click the "OK" link.
- Wait for OCR completion. A notification that Acrobat is "Converting scanned page to Searchable Image Exact" displays. Acrobat is running OCR, tagging, etc. Wait briefly for completion.
- Complete the form dialog box. A dialog box will appear asking Is this document intended to be used as a fillable form. If so, click "Yes" to detect form fields. If not, click "No, Skip this Step" as long as the document is not a form. If the document is a form, it can be made accessible, but that is not covered here. In many cases, it's better to use a tool that is specifically designed to create accessible form.
- Designate primary language for assistive technologies. Next, the "Set Rading Language" box appears. Designate the primary language for assistive technologies to use.
- Complete alternate text updates. A dialog box will appear, stating "Acrobat will detect all figures in the document and display any figures with missing alternate text." Next, the "Set Alternative Text" dialog box will appear.
- If you can identify the image. If you can tell which image the tool is referring to, type the necessary alt-text or select the box to indicate that it's a decorative figure.
- If you can't identify the image. If you can't tell what Acrobat is referring to (it is often difficult), skip it and move to the next image. You can easily add alt-text later.
- Run the Accessibility Checker. Adobe Acrobat will prompt you to run the Accessibility Checker. Select any settings desired if you want to only check certain items, otherwise leave it at the default settings for a full check. Click "Start Checking." The report appears in the navigation panes when complete. It will always show that a manual check is required for reading order and color contrast.
- Complete manual review and touch-up document structure. Next, continue to Step Three to touch up the structure; you can (and should) run a new accessibility check.
A note on Optimized Scanned Document Tool. One of the available actions from the Action Wizard is the Optimized Scanned Document tool, which you may use to initially identify text in a scanned document if you have difficulty making editable text as specified in Create Editable Text (if Needed) in Step 1.
![[Figure 3] Screenshot of the 'Make Accessible' tool sidebar with menu options divided into sections, including '1. Prepare', 'Set Language & Tags', and '3. Run Accessibility Check.' Each option includes steps such as 'Add Document Description, 'Autotag Document' and 'Set Alternate Text' that allows users to correct accessibility issues in Adobe Acrobat.](/main/images/divisions/tlt/components/accessibility/streamlined/make-accessible-tool.jpg)
Step 2.b. Autotag the document
If you don't want to use the Make Accessible tool, the "Autotag Document" tool in the Accessibility tools menu is another option. It will tag the document, but won't perform other steps done by the Make Accessible tool. The Autotag tool will automatically tag content based on how Acrobat interprets the structure. For short documents, manually tagging may suffice, but for longer documents, autotagging can save considerable time over manually tagging each item. Autotagging will usually misinterpret some of the items, and you can fix them with manual tagging methods.
Launching the Autotag document tool
The Autotag Document tool is launched from the "Accessibility" tool menu set in the right side bar. Click the "Accessibility" icon/link and then click the "Autotag Document" icon or link. [See Figure 4 for a visual example]
When Autotagging is complete, an accessibility recognition report opens and a report icon appears in the navigation pane in the left sidebar. This report contains information about areas where the tool has reduced confidence in its actions, which is intended to alert you to the fact that a manual check is necessary.
In general, once you've autotagged the document, your next step should be to proceed with the manual tagging process to correct any mistakes.
![[Figure 4] Screenshot of a page in Adobe Acrobat with the 'Accessibility Tools' menu open in the right sidebar. Options include 'Reading Options,' 'Full Check,' 'Reading Order' and more. A green arrow shows users where to click to turn on the 'Autotag Document' option in Adobe Acrobat.](/main/images/divisions/tlt/components/accessibility/streamlined/screenshot-autotag-document.jpg)
Step 3. Review and correct tags and order
Structural tags designate the type of content in the PDF. Screen readers use the tags to as context to identify the type of information. The "Order Panel" shows the reflow order for the document content, and it allows you to access the "Touch Up Reading Order" (TURO) tool to see the page content structure and manually indicate or change content structure (tag) types.
This step of the streamlined procedure indicates how to change structural tags and it's recommended to mark up all headings, at a minimum. Headings allow screen reader users to navigate between sections, much like sighted users do when skimming through the various topics in a document.
Whether a PDF's tags were generated from a digital document when it was saved as a PDF or via the autotagging feature, you should review and touch up the tagging (at least for headings at a minimum) to make it more accurate. Use the tabs in this box to learn how to tag headings and check the reflow order.
Step 3a. Tagging headings and critical content
Tagging content and revising erroneously tagged content involve the same processes. The guidelines below apply to either task.
Start by launching the "Touch Up Reading Order" (TURO) tool as indicated below. Read about TURO if you haven't used it before, and if you are familiar with the TURO tool, scroll down to Step 3.a.2: Structuring (Tagging) Content Using the Order Panel below.
Step 3.a.1. Touch-Up Reading Order (TURO) tool and settings
The TURO tool helps designate, change and display content structural types and page content order. The tool is launched when the Order panel is active (icon is in navigation pane on left sidebar). There are two ways to open it:
Option 1. Click "Reading Order" from the "Accessibility" options on the right side menu. [See Figure 5 for a visual example]
![[Figure 5] Screenshot of the 'Accessibility' drop-down menu in Adobe Acrobat with options such as 'Autotag Document' and 'Reading Options.' A green oval around 'Reading Order' shows users where to click to launch the Reading Order Panel.](/main/images/divisions/tlt/components/accessibility/streamlined/screenshot-launch-turo.jpg)
Option 2. Click the "Options" button/link at the top of the "Order Panel" and click "Select Reading Order Panel." [See Figure 6 for a visual example]
![[Figure 6] Screenshot of the 'Order Panel' menu in Adobe Acrobat with a green arrow pointing to the 'Showing reading order panel' menu link that users can click to launch the Reading Order Panel.](/main/images/divisions/tlt/components/accessibility/streamlined/screenshot-launch-turo-options.jpg)
Below are some important features of the TURO tool that you will use for PDF accessibility remediation. [See Figure 7 below for corresponding visual example]
- Structural Types. These buttons will set tags for various types of content. If an item is incorrectly tagged, you can revise the structure type using these items.
- Table Editor. Used for tagging table headings, etc.
- Page content order and Structure types radio buttons. These options show the reflow order or the type of content tags. You will switch between these two views often.
- Checkbox for display-like elements in a single block. Checked by default, it is recommended to deselect/uncheck it. This allows you to see how things are tagged at a granular level.
- Clear Page Structure. Clears the entire structure for the page if autotagging is too messy and you would prefer to manually tag the page items.
- Show Order Panel. Toggles on the Order panel.
![[Figure 7] Screenshot of the 'Touch Up Reading Order' tool in Adobe Acrobat. It is divided into sections: 1. Structural Types, which allow you to add headings, mark content as figures, label formulas and more. 2. A table editor that allows you to make changes to tables for accessibility. 3. Page Content Order and Structure Types. These radio buttons allow you to view the type of content tags on a page. 4. Display like elements in a single block. This checkbox allows you to view content on a granular level. 5. Clear Page Structure. This link/butotn allows you to tag content manually. 6. Show Order Panel button/link. Toggles on/off the Order Panel.](/main/images/divisions/tlt/components/accessibility/streamlined/screenshot-turo-features.jpg)
Step 3.a.2. Structuring (tagging) content using the Order Panel
- Display content types. Click the "Structure Types" radio button on the TURO tool so that it will display content types (these relate to structural tags) instead of numbers that indicate the reflow order.
- To select a piece of content. To select a piece of content, click and drag so that you encompass all of the content you would like to select.
- If you need to select more content. Hold down the "SHFIT" key while you click and drag to select additional items.
- If you need to de-select content. If you need to de-select content that doesn't belong with the selected item, hold down the "CONTROL" key while you click and drag to de-select that particular content.
- Mark-up appropriate headings. Once you have selected something, the buttons at the top of the TURO become active. Mark up all headings at their appropriate heading levels. Select the appropriate button to change headings from paragraph "P" text or some other tag to the correct heading level (e.g. heading level 3 "H3" is shown in the image).
[See Figure 8 for a visual example]
For instruction on properly tagging other types of content, such as figures, background materials, tables, formulas, and links, see the Procedures For Increased Accessibility instructions. Work your way through the document to correctly tag each heading (and correct other errors in previously tagged content as time permits).
![[Figure 8] Screenshot of a page in Adobe Acrobat with the 'Touch Up Reading Order Panel' active. The TURO menu is open over the content and each piece of content is highligted on the page with its tagged type (e.g., p, span, etc.). A green comment bubble with corresponding white number shows users where to click the radio button for 'Structure types' in the TURO tool and how the content looks when a user selects an area to update.](/main/images/divisions/tlt/components/accessibility/streamlined/screenshot-turo-structure-types.jpg)
Tips for using the TURO tool
- Seeing content at a granular level. Deselect display-like elements in a single block in the TURO tool. This allows you to see how things are tagged at a granular level.
- Manually tag from scratch. If the page structure is a complete mess, use the "Clear Page Structure" button/link in the TURO tool and you can manually tag it from scratch. Save before you do so (sometimes there may be items that become difficult to tag). You can revert to the last saved state by clicking "File" and then clicking "Revert."
- Simplify workflow. In the main menu bar, click "View," then click "Page Display," and select "Single Page View" to simplify the workflow.
Step 3b. Checking and reviewing Reflow Order via the Order Panel
The reflow order is indicated in the "Order Panel" to the left of the document. Although reflow and reading order are related, the tags panel controls the actual reading order. The reflow order is usually similar to the reading order and changes in the order panel will update some of the reading order, but it will not be perfectly accurate. [See Figure 8 for a visual example]
For documents with items such as tables, lists, links, etc. where reading order may be more complicated than simpler documents, use the Procedures For Increased Accessibility instructions
![[Figure 9] Screenshot of the 'Order Panel' in Adobe Acrobat with the marked reading order and its corresponding number in brackets (e.g., [25] [26]). The example in the screenshot shows content ordered from steps [17] to step [37] in an example document open in Adobe Acrobat.](/main/images/divisions/tlt/components/accessibility/streamlined/order-panel.jpg)
How to check Reflow Order
Begin by clicking on "Order" in the navigation pane to open the "Order Panel." With the TURO tool active, follow the steps below.
Select the "Page content order" radio button on the TURO tool. The document will display numbers corresponding to the reflow order for each piece of tagged content.
Review the document. Review the document to make sure the reflow order is in a logical left to right, top to bottom order (for English).
If you notice errors, you can simply click and drag items in the order panel in the left sidebar to reorder them.
Tip for using Reflow Order
It's useful to have "display like elements in a single block" de-selected (no checkmark) in the TURO tool to see the content order in a granular fashion.
Step 4: Accessibility check and review
The built-in Adobe Acrobat Accessibility Checker will test your PDF document and provide an accessibility report. The accessibility checker automatically tests for most, but not all items required to meet WCAG 2.0 level A and AA, so some manual checks will be required.
Step 4.a. Perform an accessibility check
To run an accessibility check, perform the following:
- Run a full check. Click on "Full Check" from the "Accessibility" tool options (right side-bar menu).
- Choose your accessibility checker options. The "Accessibility Checker Options" window will open. Determine if you would like to create an accessibility report by selecting or de-selecting the checkbox next to" Create Accessibility Report" and using the "Choose" button/link to navigate to the desired folder if you prefer to save it to somewhere other than the listed default location.
- Specify your page range. Specify the page range if not checking the entire document, otherwise leave the radio button next to "All pages in document" (default) selected.
- Specify what you want to check. In the "Checking Options" box, select the items what you desire to check. In most cases, you'll leave everything at the default settings, e.g., keep "Document" listed in the "Category" dropdown and leave all other checkboxes selected (default).
- Start the accessibilty check. Click "Start Checking" link to run the test. The results will appear automatically with a new Accessibility Checker icon in the navigation panes section. If you have chosen to create an accessibility report, a paper clip icon for "Attachments" will also appear, allowing you to quickly open and view the report in a browser.
Step 4.b. Review Accessibility Checker results
Click the plus sign "+" toggle next to any item to drill down for detail. Some items allow you to right-click on the failed item and click "Fix" to immediately fix the issue. For others, you will need to drill down to the individual item, find it in the document, then make desired changes.
If you haven't used the "Make Accessible" action, right clicking on an item and selecting "Fix" is the quickest way to quickly add the title, language and set the tab order. It is also easier to see specific images that need alt-text (and add it) by right clicking the alt text error and selecting Fix.
Proceed to Step 5 for information on how to remediate items that have failed the accessibility check (and keep in mind that greater detail is presented in the Procedures For Increased Accessibility instructions.
Step 5. Remediate items that fail accessibility checks
Some items allow you to right click on the failed item and select "Fix" to immediately fix the issue. For others, you will need to drill down to the individual item, find it in the document, then make desired changes.
Items that aren't presented in this Streamlined Method for Basic Accessibility may be covered in the Procedures for Increased Accessibility, and Adobe Acrobat will also display links with instructions on how to fix items if you right click an error and select "Explain."
When you use the "Fix" method for failed items, the accessibility checker will automatically change these to a Passed state. However, the checker results don't change for items that you've fixed manually, and it's always good practice to run a full accessibility check at the end of the process, just to be sure no additional accessibility errors have been introduced during remediation.
Setting alt-text for a figure that fails an accessibility check
Alt-text can be added quickly if a figure'/image's alternate text fails the accessibility checker validation tests. Use the following steps:
- Expand the details beneath the image that failed
- Select a figure number
- Right-click the item and click "Fix"
- In the "Set Alternate Text" dialog box and you may do one of the following:
- Type the alt-text.
- Signify the image is a decorative figure by clicking in the "Decorative figure" checkbox. If you select that option, screen readers will not announce the image.
- Navigate to other images by using the left and right navigation arrows
- Click "Save & Close" link when complete
![[Figure 10] Screenshot 'Set Alternate Text' dialog box, with options to cycle through multiple images. Green comment bubbles with corresponding numbers show users where to add alt-text in the 'Alternate Text' box and the checkbox labeled 'Decorative figure' users can use to signify the image is decorative and the screen reader will not announce the image.](/main/images/divisions/tlt/components/accessibility/streamlined/screenshot-alt-text-box.jpg)
Setting the Title and Language from Accessibility Checker results
The easiest method for remediating the document with the required metadata is to do the following:
- Right-click on the text for the failed "Primary Language" or "Title"
- Click "Fix"
- For the Primary Language, a "Set Reading Language" dialog box will appear. Use the dropdown arrow next to Primary Language to specify the primary language.
![[Figure 11] Screenshot of the "Set Reading Language" diablog box with a drop-down option that llows users to select their preferred language for the document and an "OK" and "Cancel" button to confirm those options.](/main/images/divisions/tlt/components/accessibility/streamlined/screenshot-save-language-as.jpg)
For the Title, depending on your system and the version/update of Adobe Acrobat, selecting"Fix" will either automatically use the file name as the document title or it may open a "Description" dialog box that allows you to type the title. Whether Adobe Acrobat adds the Title or you enter it and click the "OK" link to save it, Adobe Acrobat will also change the setting to display the title, which will allow the title to pass the next accessibility check.
What to do if a PDF fails Tab Order
After running an accessibility check, if the document shows that the "Tab Order" has failed, the presentation order for someone tabbing through the document has not been set (or automatically set).
To use the automated method for fixing Tab Order, perform the following steps:
- Right-click on the "Tab order - Failed notification" and click "Fix"
- Click "OK" button/link in the confirmation box that appears stating the "Tab order set to match structure order in all pages successfully."