Sharing videos from My Media with your class via the Media Gallery
Media gallery tutorial
Learn about the Media Gallery for presenting your videos in WebCampus.
The Media Gallery is a course repository where you can publish/share content from your My Media for students to view. Content in your My Media area can be shared across Media Galleries for any of your courses.
Step 1: Log in to WebCampus and browse to your course.
Step 2: Click on Media Gallery in the left-hand course menu. (If Media Gallery is not in your course menu it will need to be enabled.)
Step 3: On the Media Gallery page, click the + Add Media button.
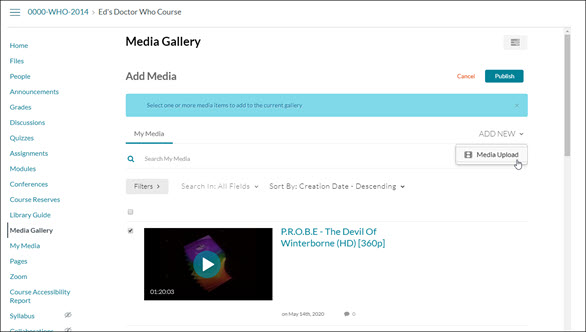
Step 4: The next page will allow you to select one of the files you already have in your My Media or upload a new file via the Add New drop-down menu.
Step 5: To add a video already in My Media, click the checkbox next to the video(s) you’d like to add, and click the Publish button.
Step 6: The video will be added to your Media Gallery and you will be taken back to the main Media Gallery page. Student can now access the video through the Media Gallery link in your course.