Support for administrative meetings
For administrative web conferencing support, please contact the Office of Information Technology.
The Zoom web conferencing tool is available for the campus. The University of Nevada, Reno licenses the Zoom for Education plan for all faculty, staff, and students.
This plan allows for unlimited duration meetings, meeting capacity of 300, and cloud video storage for recorded meetings.
Please visit the University of Nevada, Reno Zoom web portal to provision your account.
Step 1: In the Zoom application, click/tap on the Sign In button.
Step 2: Click on the SSO button.
Step 3: If prompted, enter 'unr' in the domain field.
Step 4: Enter your NetID and password.
Information and guidance for students attending class sessions through Zoom can be found in the student guide for Zoom.
Learn how to remove a disruptive participant from your Zoom sessions, and how to set up a Zoom session to be more secure against disruption and attack.
Zoom is a web conferencing tool that can be used for live class sessions, presentations by guest lecturers, instructor office hours, or interactions between students and peers. Zoom allows you to conduct class or hold meetings in a live online format using a web camera and microphone while sharing the contents of your screen. It features the ability to share your screen, a chat function, a virtual whiteboard, breakout rooms for smaller discussions, and allows you to record your sessions.
Zoom is accessed via the web portal, as a standalone application on your desktop or phone, or in WebCampus. With the WebCampus integration, you can add the Zoom link to your course menus for easy deployment in your courses.
Please visit best practices for teaching live with Zoom for information on instructional strategies.
Getting started on Windows and Mac (external link to Zoom site)
With the increased reliance on web conferencing for instruction, sound security practices need to be emphasized to minimize disruption and exposure to threats. A recent trend of Zoombombing, wherein internet trolls (often with no affiliation to the class or University) gain access to unsecured Zoom meetings can be combated by:
For more best practices on securing your Zoom sessions, see our page on preventing Zoombombing.
The first time you use Zoom, please visit the University's Zoom Video Conferencing Portal and sign in there. This will trigger the account creation, and allow Zoom to be accessed from WebCampus.
Zoom can be added to your WebCampus course menu for convenient scheduling from within the course. Students can access your scheduled meetings directly from this menu item. To integrate Zoom with your WebCampus course follow the steps below:
Students may access Zoom sessions using the Zoom course menu link in WebCampus. However, if you choose not to use the Zoom WebCampus integration to create the session, the link to the session can instead be put in a course message, or in a course announcement.
Many issues can be avoided by conducting a test session or dry-run before a critical web conference in Zoom. In instructional applications, it is recommended that a test session be put on the course schedule well in advance of any required Zoom meeting.
Contact Teaching & Learning Technologies if an error relating to authentication or authorization appears when you click the ZOOM menu item. When Zoom launches, it attempts to determine if your account in WebCampus is associated with a valid Zoom login. Errors similar to the one pictured below may indicates that either you do not have a Zoom account, or that your email address in WebCampus differs from the one used on your Zoom account:
Problems with audio and microphones
The Zoom Help Center offers a comprehensive tutorial for connecting to Zoom audio on a wide array of different devices: How do I Join or Test My Computer Audio? (external link to Zoom site)
If you are not able to hear the audio in a Zoom session, you may need to check your audio hardware and settings on your computer.
Check to make sure your headphones are plugged into your computer. If your headphones are USB headphones and your computer has multiple USB ports, try disconnecting from one port and connecting to a different port. If after reconnecting your headphones an installation process begins, make sure to follow through with all steps of the installation process.
On a windows device, ensure the default audio device is set to your headphones rather then your built in speakers. Right-click on the sound icon in the taskbar and select "Playback Devices." Right-click in an empty area of the list of devices that show up, and select "Show Disconnected Devices" as well as "Show Disabled Devices." Find your headphones from the list of devices and right-click on them. Click "Set as Default Device."
To enable live-captions in your meetings:
Step 1: Click on the Show Captions button from the Zoom meeting controls in the lower portion of the Zoom interface.

Note: If you do not see the Show Captions button, it is possible that your Zoom window is reduced in size and you will find the same link under the More button.
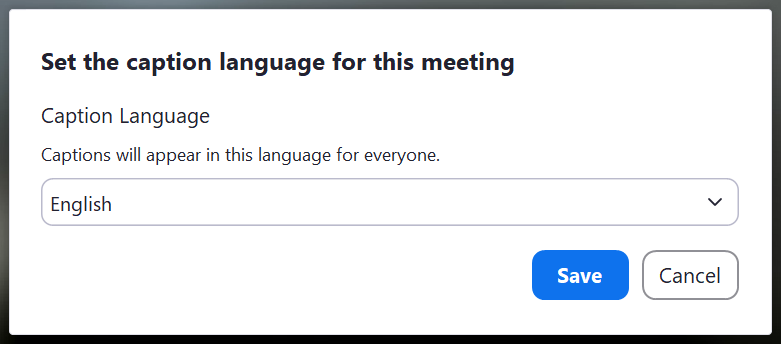
Step 2: Choose the language you wish the captions to appear in. Zoom supports multiple languages and will also translate automatically if the language chosen differs from what is spoken in the meeting.
Zoom meetings can be secured to prevent malicious disruptions and 'Zoombombing' attempts. See the how to prevent Zoombombing page for more information.
Zoom keeps an attendance record for meetings. To access the record of who attended a Zoom session, please make sure the meeting has ended and follow the instructions below:
To record your Zoom session follow the instructions below:
Depending on how you recorded your Zoom session, you can make the recording available to students as follows:
Direct students to click on the Zoom item on your WebCampus course menu. Recordings will be found under the ‘Cloud Recordings’ tab once they have processed. Allow for up to a day for recordings to process before they appear.
Locally recorded Zoom sessions can be uploaded to the Kaltura video hosting platform. See Using Kaltura to deploy multimedia content in WebCampus for more information.
To designate a co-host for your meeting, follow the steps below:
A co-host can be added to your meeting before it starts as long as they have activated their Zoom account at the University of Nevada, Reno. Please ask that they sign in to the University's Zoom portal to activate their account. People who do not have an affiliation with the University will need to be added as a co-host after the meeting begins.
When the co-host enters the meeting, they will be recognized as the co-host.
Any participant in your Zoom meeting can be made a co-host during the meeting. This includes participants who are not affiliated with the University.
Be careful not to click on ‘Make host’, as that will take the hosting ability away from you and you will not be able to get it back without asking the new host to grant it to you.
By default, students may present in your Zoom session by clicking on the Share Screen button. If someone else is sharing at the time, they will need to have stopped sharing before the student may share their screen. As the host, you may share your screen at any time, regardless of whether a student has already initiated a screen share.
To invite a guest speaker, send the URL of your Zoom meeting via email to the guest. After they join your session, you may assign them as a co-host as follows:
Zoom can utilize the camera on your iPhone or iPad to act as a simple document camera. See our guide on how to make an improvised document camera for more information.
For administrative web conferencing support, please contact the Office of Information Technology.