Student guide to Navigate
Navigate is designed to assist you with your academic success by centralizing advising and tutoring appointment scheduling. For specific questions about Navigate, contact your academic advisor.
How to access Navigate
The first step is to log-on to Navigate by heading to the Navigate web portal. You must sign in with your NetID and password. If you have issues with your NetID or password, contact OIT Help at (775) 682-5000.
How to schedule an advising appointment
Step 1: Select the "Schedule an Appointment" option from Navigate
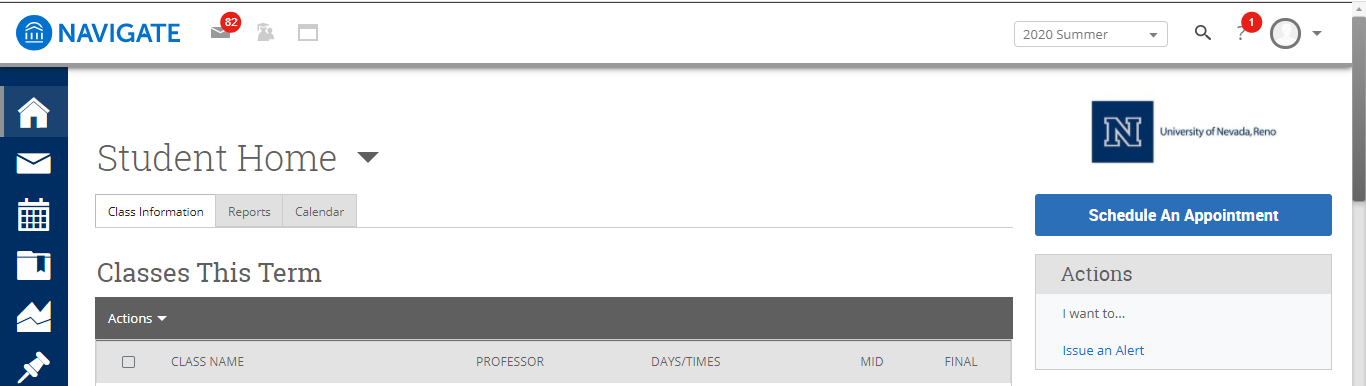
After logging into Navigate, you'll be taken to your Student Home Page that has an overview of your classes and student information. Click on the "Schedule an Appointment" link that's on the right side of the student dashboard. This option will trigger a drop-down that allows you to take the next step.
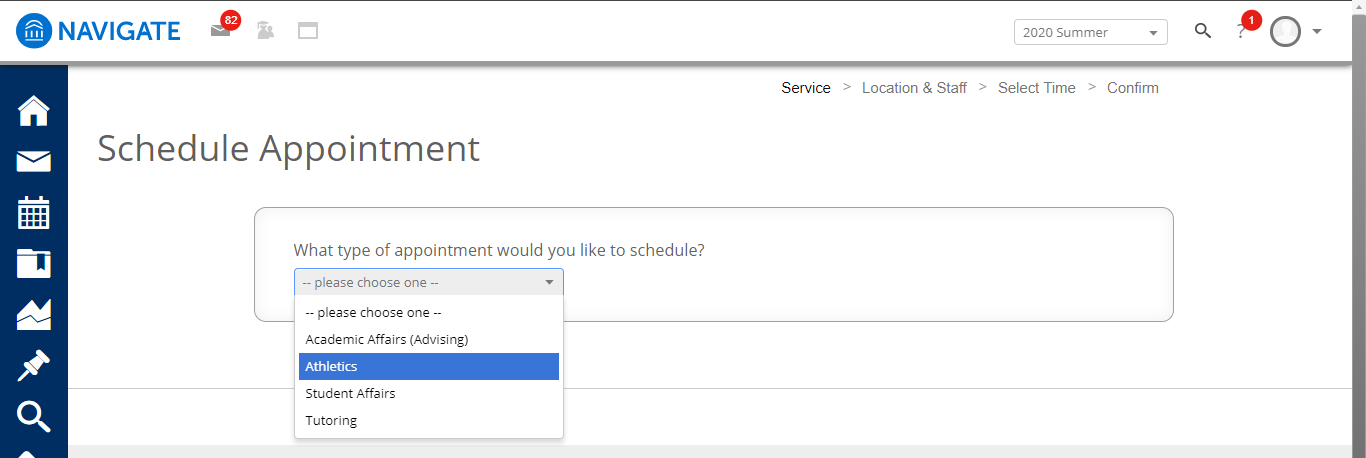
Step 2: Choose your appointment type
After clicking on "Schedule an Appointment," a drop down will appear with the title, "What type of appointment would you like to schedule." Students can select advising, tutoring, athletics, or student affairs
Step 3: Select your appointment service
After selecting "Academic Affairs (Advising)" from the drop-down menu, a new drop-down menu titled "Pick a Service for Your Appointment" will become available. Select the option on the menu that is correct for you, such as "University Advising Center."

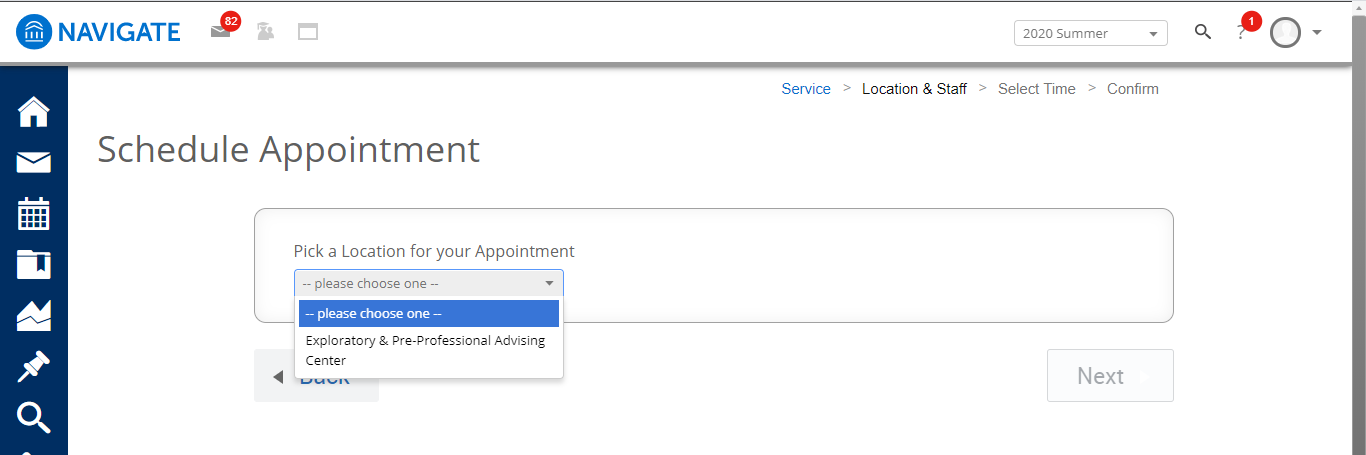
Step 4: Select your appointment location
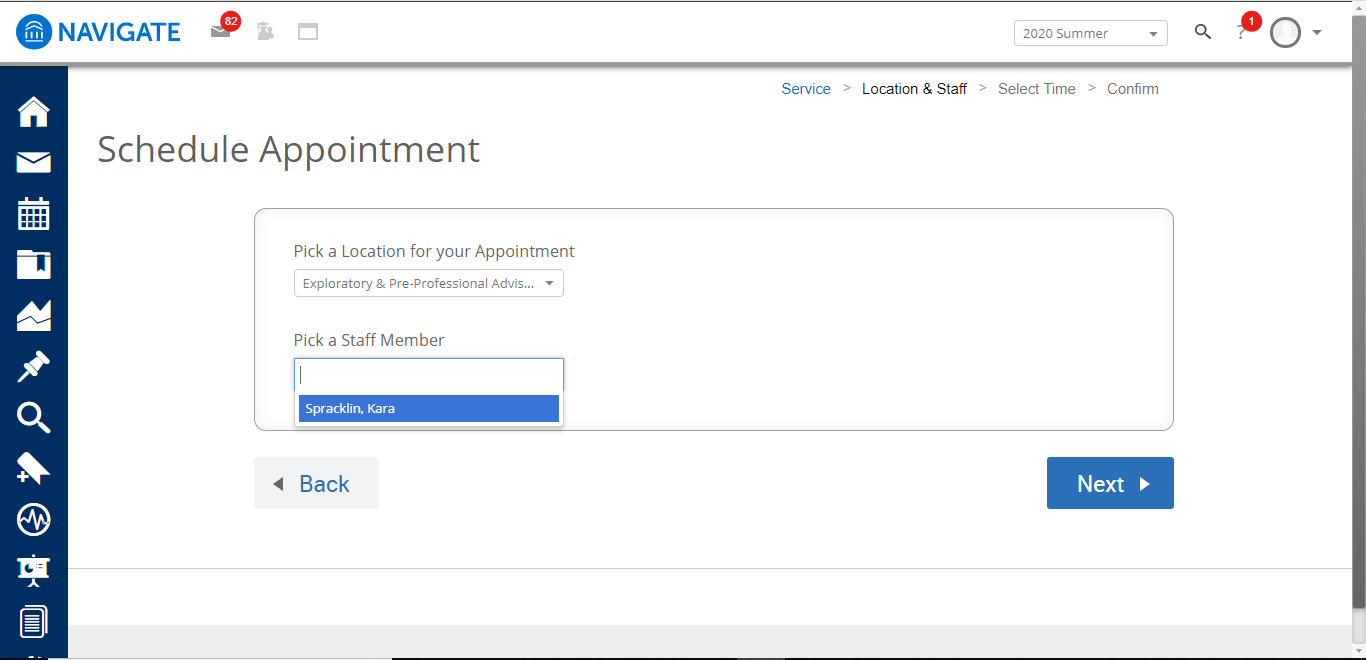
After selecting your service from the drop-down menu, a new drop-down menu titled "Pick a Location for Your Appointment" will become available. Location options will vary based on the services offered by each department and the type of advising appointment available. Select the option on the menu that is correct for you, such as "Exploratory & Pre-Professional Advising Center."
Step 5: Select your requested advisor (if available)
After selecting your advising appointment location, select your requested advisor. This option may not be available based on your department and available advising services.
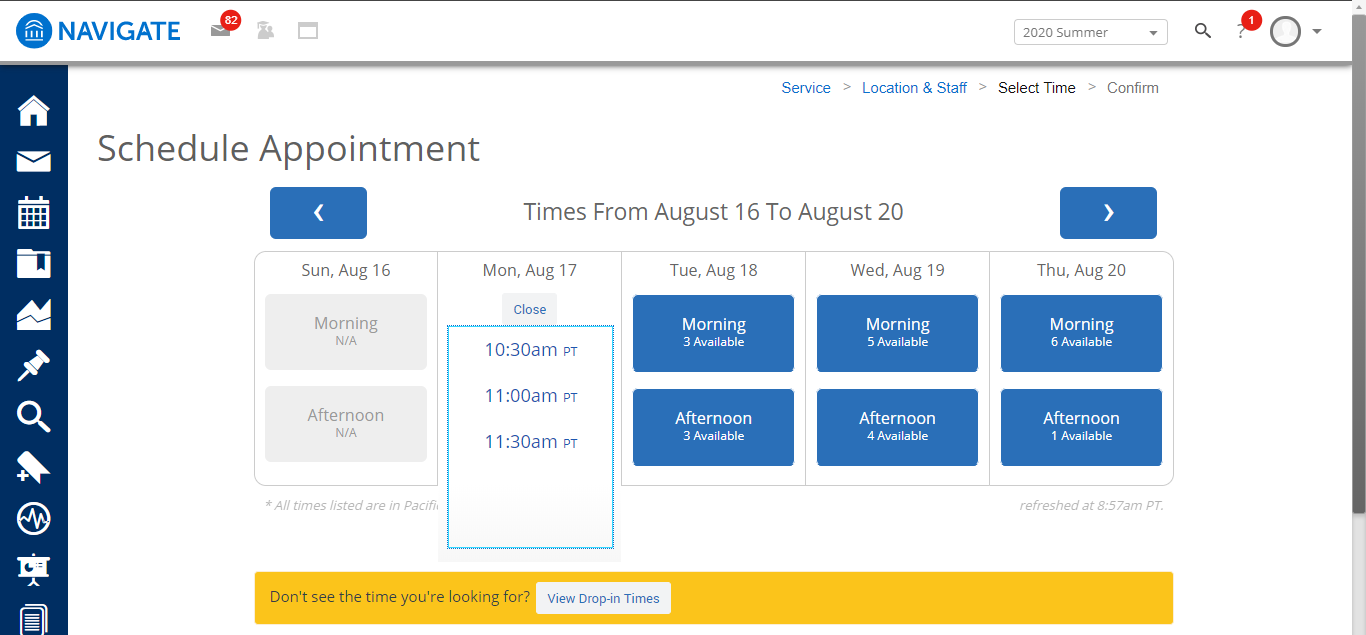
Step 6: Select your appointment time and date
After selecting your advisor (if available), a new screen will appear that allows you to select the time and date for your appointment. You may use the arrows to cycle through the weekly calendar to find either morning or afternoon appointment times that work for your schedule. When you click on the "morning" or "afternoon" options, a list of times will appear (e.g., 10:30 a.m., 11:30 a.m., etc.). Click on the time you would like to select and it will become highlighted.
The screen also has an option "View Drop-in Times" that shows information about times you can visit with a staff member without making an appointment in advance.
Once you have selected your time window, click the link that says "Next" to move to the final step in the process.
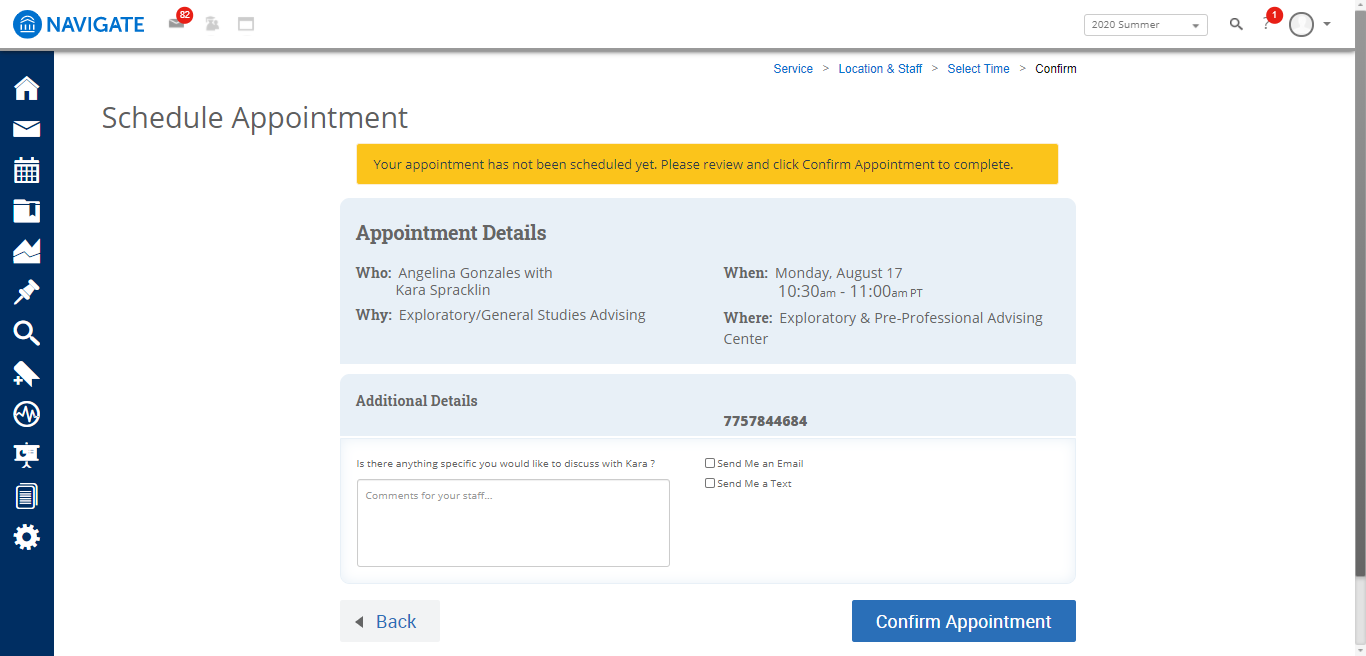
Step 7: Review your information and confirm appointment
After selecting your time, you must confirm your appointment. A message will appear that reads "Your appointment has not been scheduled yet. Please review and click Confirm Appointment to complete." This screen will also include information about your appointment details, including your advisor, the reason for your meeting, the date and time, as well as the location.
You can use the text box titled "Is there anything specific you would like to discuss with [advisor name]" to provide additional information about your upcoming meeting. Adding this information can be helpful to the advisor as they can prepare for the meeting in advance.
You may also use the two links, "Send Me an Email" or "Send Me a Text" under the option "Would you like to set a reminder" to receive an automated email or text reminder from Navigate. If you select "Send Me a Text," use the text box below to enter your phone number.
Finally, use the "Confirm Appointment" link to confirm your appointment within Navigate.